React Testing Library
Background about RTL
- Developed by keystone person in React community and creater of Remix
- He intends to fix the UI unit testing problem by abstracting the implementation details
- The tests resemble the actual scenario at use rather can creating the scenario
- Key features
- Light weight
- API to identify the nodes
- Has won open source awards in 2019
Architecture
- Contains the core library
DOM Testing Libraryto identify the nodes on the DOM simulated by JSDOM/Jest in the browser - Then we have wrappers for all major UI libs like React
React Testing Library
Guiding principles
- Good practice is to avoid testing internal details of the component like state, methods, lifecycle hooks
- Refer guiding principles
Core API
The core API has queries, helper methods, user events included.
Important job of a query is to find elements on the page
3 types of queries
- Get - starts with
getBy. Returns single matching node orerror. To get multiple, usegetAllBy. - Query - starts with
queryBy. Returns single matching node ornull. To get multiple, usequeryAllBy - Find - starts with
findBy. Returns promise which resolves when matching element is found or its gets rejected. Internally they are a combination ofgetBy&waitForhelper method.
Apart from standard queries, we have helper methods to assist with special cases.
Once a DOM element has been queried, we can simulate user actions with user events.
Finally we can perform assertions with Jest Library on the data.
getByRole can be tricky because it works closely with accessibility concepts. You cannot pass html inputs as arguments, instead stick to textbox, button, link etc.
Hello World with RTL
import { render, screen } from "@testing-library/react";
import App from "./App";

test("renders learn react link", () => {
  // Renders the App component to a document body
  render(<App />);

  // Used for debugging, just prints the markup to the console. Eslint rule throws warn/error when used
  screen.debug();

  // Get single DOM Element containing text, its a regex pattern thats passed as argument
  const linkElement = screen.getByText(/learn react/i);

  // Jest assert statement
  expect(linkElement).toBeInTheDocument();
});
Queries
Testing Forms
Here is the order in which you should test forms with rtl. This priority is decided based on guiding principles and accessibility.
getByRole- the first arg is the name of the html element, the second arg is the name of the element.getByLabelText- Good for form fieldsgetByPlaceholderText- Used when no labels are usedgetByDisplayValue- select element based on display value
Testing Normal Elements
Here is how you test the non interactive elements like div, p, etc.
getByText
Testing semantic elements
getByAltText- useful for elements with alt tags like imggetByTitle- some elements contain titles but not all screen readers use the title
Testing the impossible
To test the elements which are impossible to select with the above strategies, we use test-id.
getByTestId- also useful when aspects of the page are dynamic.
test("should contain username field", () => {
  render(<App />);

  // this statement would fail the test case because it throws an error when the matching element was not found.
  screen.getByLabelText("Username");

  // this statement would not fail the test case even if the element is not found. So you need to write the expect statement.
  const label = screen.queryByLabelText("Username");

  expect(label).toBeInTheDocument();
});
screen Object
DOM Api exposes a global object called screen which has all the Api methods that has all query types attached to screen object. It means, you can access getBy.., findBy..., findAllBy.., queryBy.. etc from the same object.
screen object exposes debug method to assist debugging. The debug method takes in arg which can print one or more elements to the console.
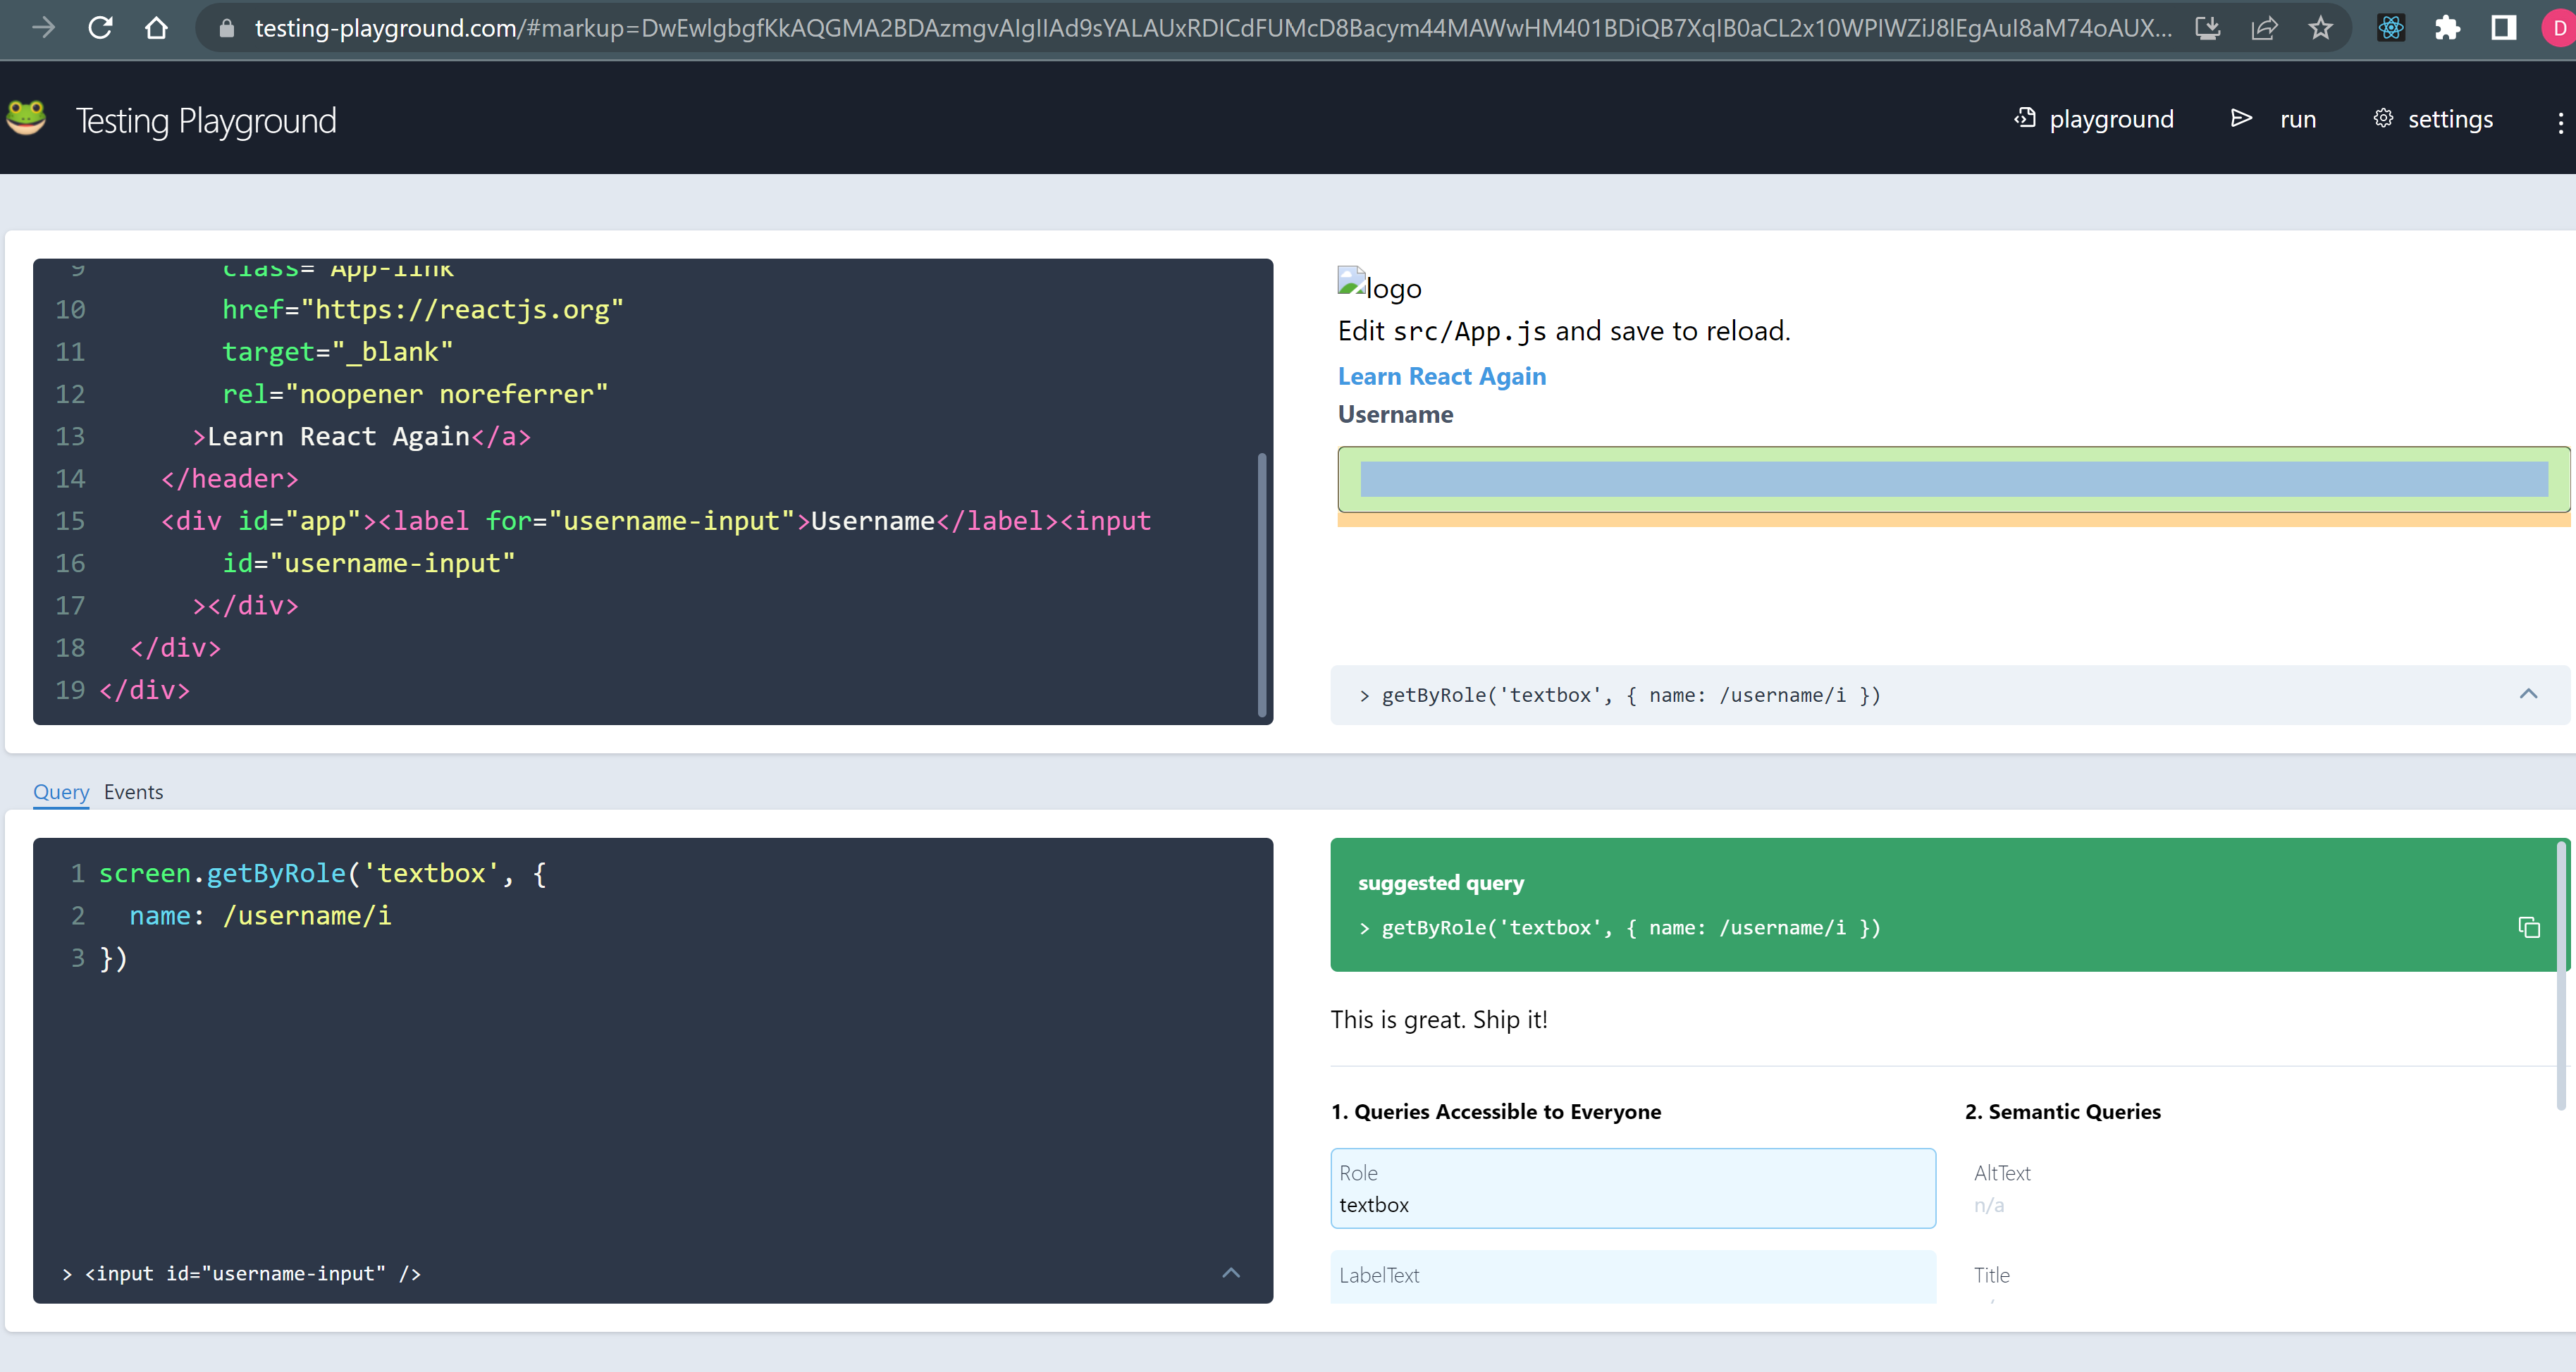
Testing Playground
Use screen.logTestingPlaygroundURL() and a cryptic url is seen in the console. When you open in the browser, you can take the help of the webapp to generate selectors automatically. While writing selectors, avoid using classes/ids because they are not seen by the user. If you had to use id/class then fall back to test-id.
By default, DOM query will trim the text that was found in the DOM. To prevent that behaviour we need to pass normalizer method in the options.
screen.getByText('text', {
  normalizer: str =>
    getDefaultNormalizer({trim: false})(str).replace(/[\u200E-\u200F]*/g, ''),
})
Firing events
Querying the elements from DOM is not sufficient at all the times. Sometimes we need to simulate click, change and other events on them. Thats where the fire events come handy.
For fire events we use fireEvent Api. fireevent needs to be imported from testing library wrapper.
<div id="app">
  <label htmlFor="username-input">Username</label>
  <input id="username-input" />
</div>
import { render, screen, fireEvent } from "@testing-library/react";
import App from "./App";


test("should contain username field", () => {
  render(<App />);

  fireEvent.click(screen.queryByLabelText("Username"));

  fireEvent.change(screen.getByLabelText(/username/i), {
    target: { value: "a" },
  });
});


// Jest mock example
const Button = ({onClick, children}) => (
  <button onClick={onClick}>{children}</button>
)

test('calls onClick prop when clicked', () => {
  const handleClick = jest.fn()
  render(<Button onClick={handleClick}>Click Me</Button>)
  fireEvent.click(screen.getByText(/click me/i))
  expect(handleClick).toHaveBeenCalledTimes(1)
})
TODO: Get more real examples on user events